Price Rules in QuickBooks Online are here!. Price rules/Price levels are one of the few features that I’ve said I need in order to put all of my clients on QuickBooks Online and then never look back at QuickBooks desktop. (Unless it’s to convert to QuickBooks Online).
For the record, the other features are:
- Integrated direct labor costing. This one… I have nothing to say about it right now. It’s still the one thing that keeps my contractor clients from making the jump. Let’s just not talk about it and move on to the good stuff.
- Progress Invoicing. I’m actually doing beta testing for this. SQUEEEEE.
- Receive Partial Purchase Order. We now have that! Check out that article here.
This post, my friends, is about Price Rules in QuickBooks Online. Known in Desktop as Price Levels, so let’s dig into how we can set them up and use them.
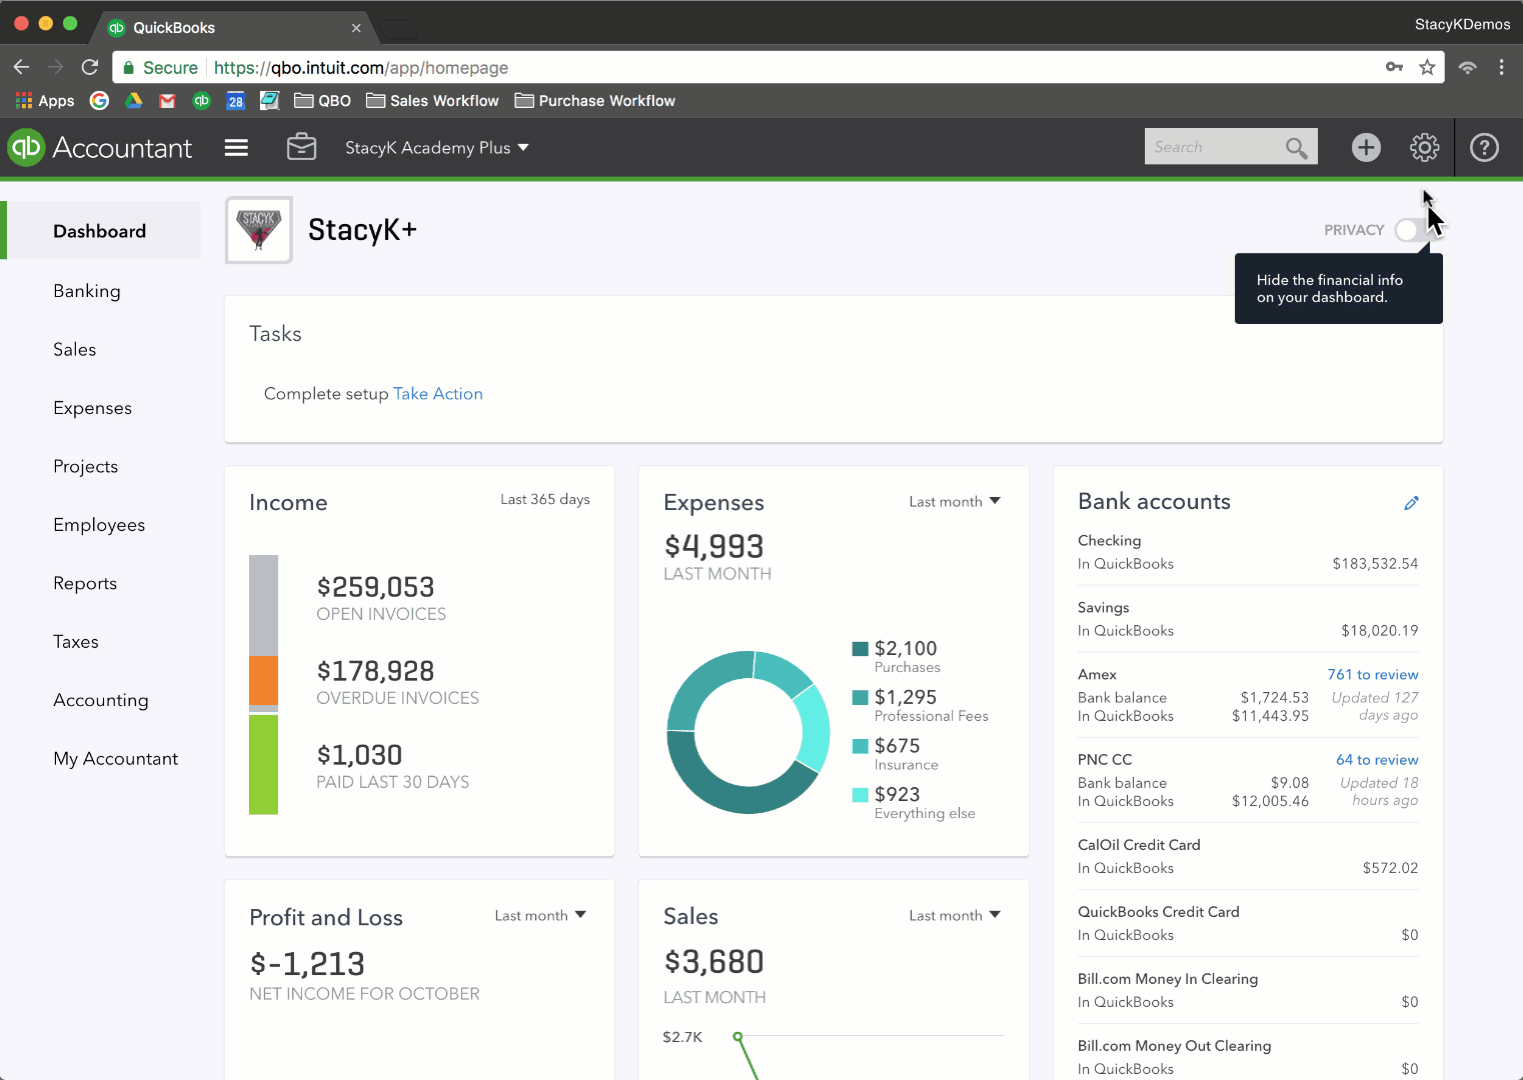
First we want to click on the Gear Icon in the top right corner, then choose Account and Settings.

Once we have the preference turned on, we can (yay!) start using Price Rules in QuickBooks Online.
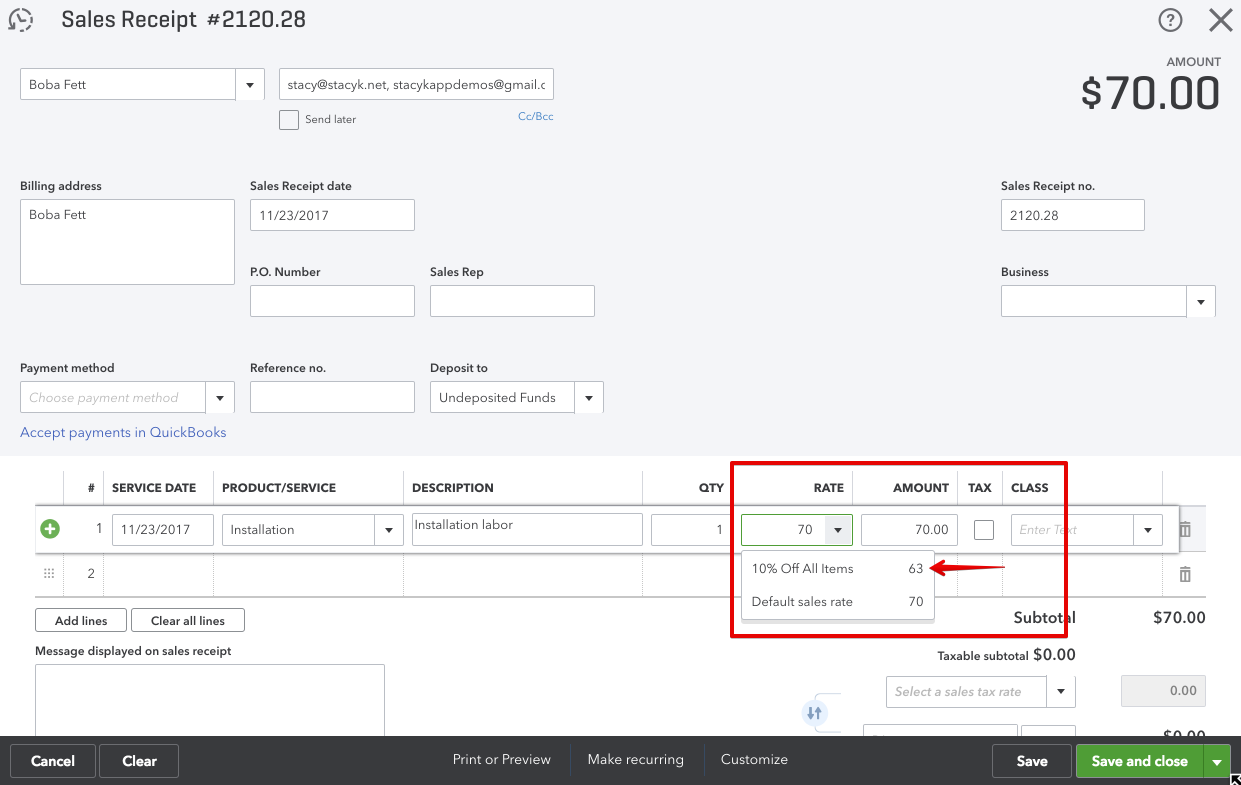
First, we’ll create a general price rule. This one is a just a blanket 10% discount that can be used for any customer on any product or service:
We’ll use it on a sales transaction:
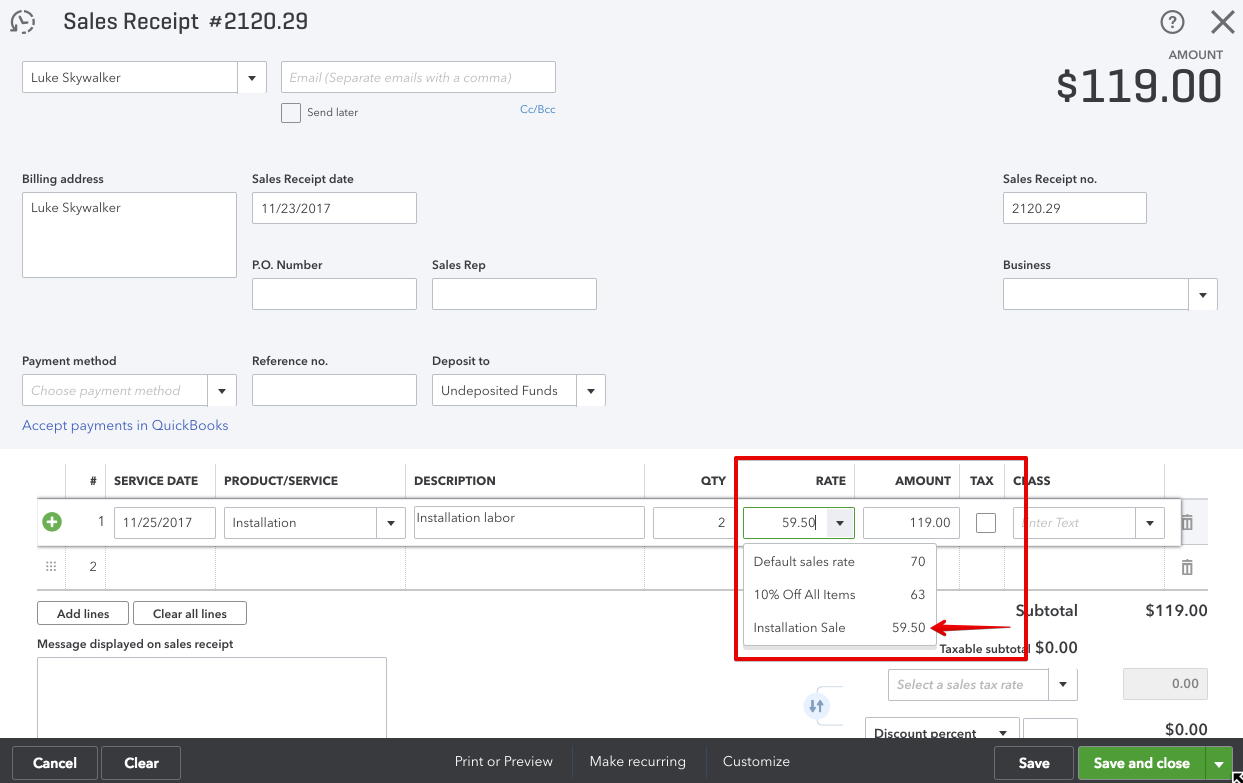
We can also create a new rule when we edit an item from our Products and Services list. In this example, I’m setting up a 15% discount on installation services, that will only run through the weekend.


Here’s how it looks when used on a sales transaction:
One last example of price rules in QuickBooks Online that I want to show is when you have pricing per item, per customer.
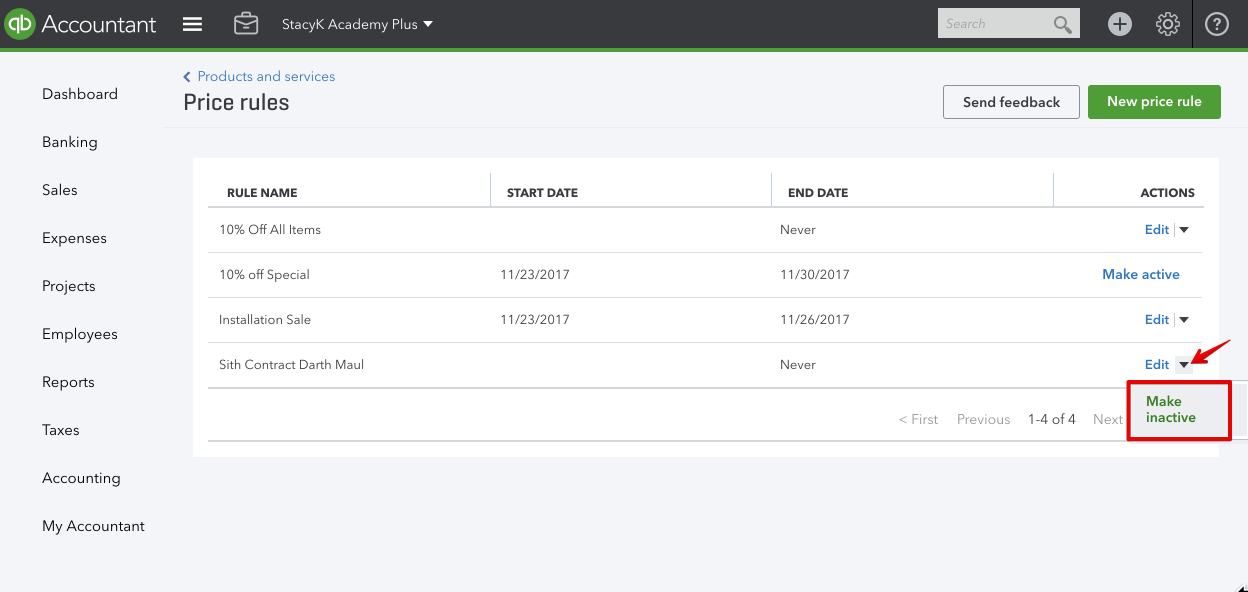
We’ll go Gear Icon > Products and Services, then click that drop down on the More button to choose Price Rules. Once you see the list of your price rules in QuickBooks Online, click the green New price rule button.
Here I am setting this up, and instead of choosing to set the price or rate by percentage or fixed rate across all of the items, I chose Select Individually and then adjust each item, per the contract. Because I chose to have this price rule only apply to one customer, it won’t be available when I create sales transactions for other customers.


The last thing I want to show is that you can make any of the prices rules in QuickBooks Online inactive, so that they cannot be used when creating Sales Transactions.
If you go back to the same place we just were: our price rules list, we can click on the Edit button in the action column and make any of them inactive. PRO TIP: if you’re logged into your account, here’s a shortcut to the list of price rules in QuickBooks Online: https://qbo.intuit.com/app/pricerules.
So there you have it! A nice overview of how price rules in QuickBooks Online are created and used.